Wood Needed

This is a picture of the plywood and boards needed to make the car. figure sk-1 This drawing (sk-1) shows the basic lumber required to build a car. It consists of two 8 foot long 2 x 2s, two 8 foot 2 x 4s, one 8 foot 2 x 8, and ...

Frame – Cutting the Plywood
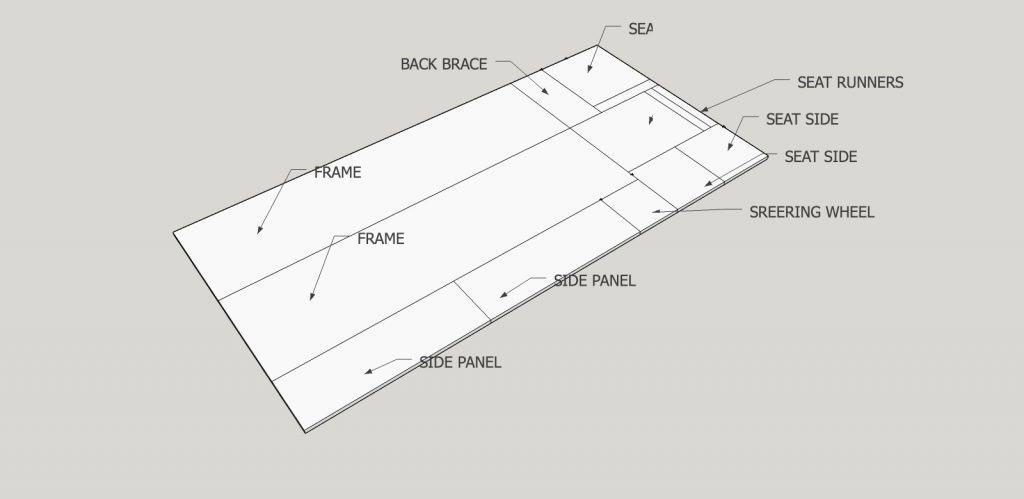
Figures sk-2 and sk-3 show the recommended cutting of the sheet of plywood. Cut the cross piece first. figure sk-2 figure sk-3 ...
Frame – Gluing and Screwing Together
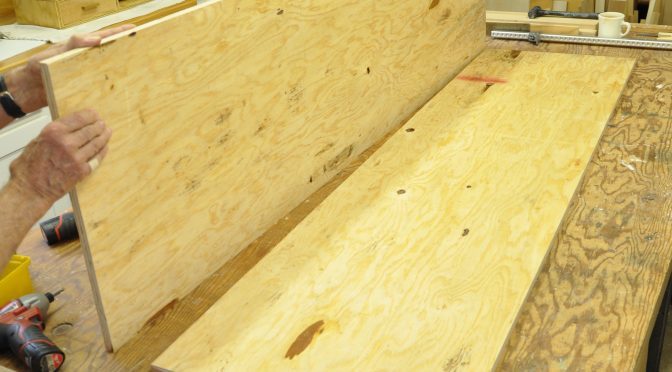
The two pieces marked as “frame” are glued and wood screwed together as shown in sk-4 and sk-5. figure sk-4 figure sk-5 This results in a frame 72″ long, 19″ wide, and 1 1/2″ thick. TITEBOND III Glue should be used. Make sure no wood screws are placed where the ...
Frame – Cutting the Brake Slot
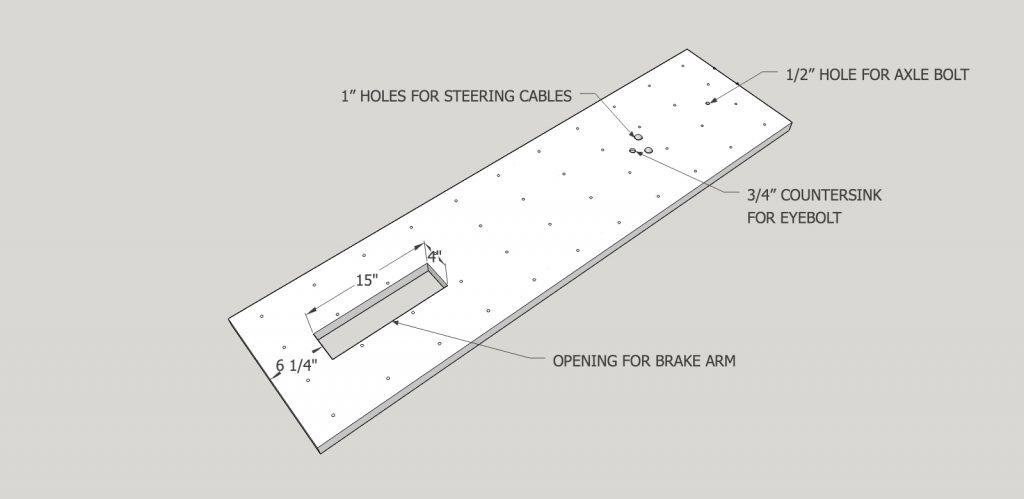
After fastening the two pieces of plywood together, drill four holes for the brake arm slot and cut openings as shown in sk-6 for the brake arm. figure sk-6 Use a saber saw to cut out the slot for the brake arm ...
Frame – Steering Cable Holes
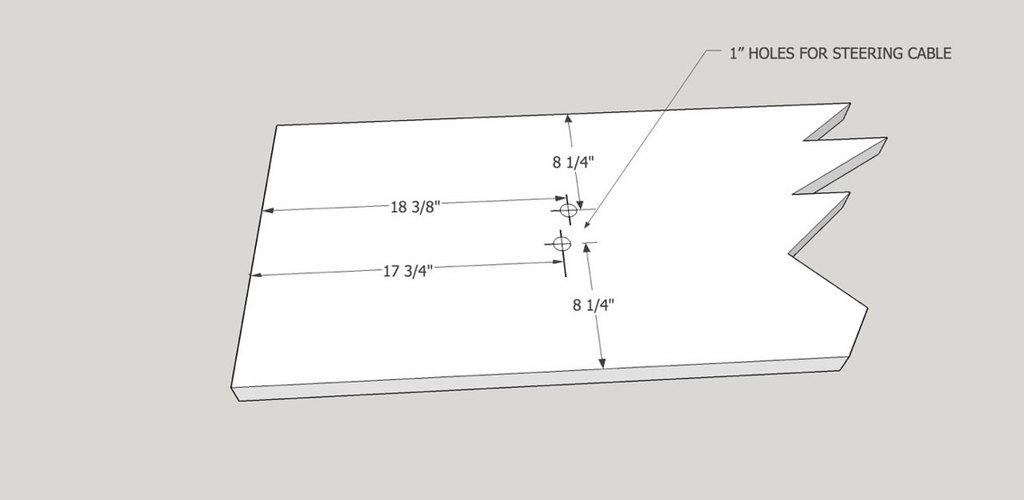
Drill two 1″ holes for the steering cable and drill a 3/4″ counter sink for the brake cable eyebolt Locate and fasten a mending plate to the underside of the frame by the two holes for steering cables. Attach pulleys for the steering cables as shown ...
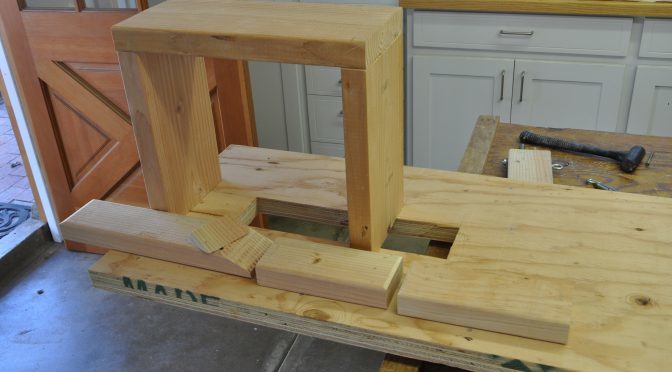
Steering Frame
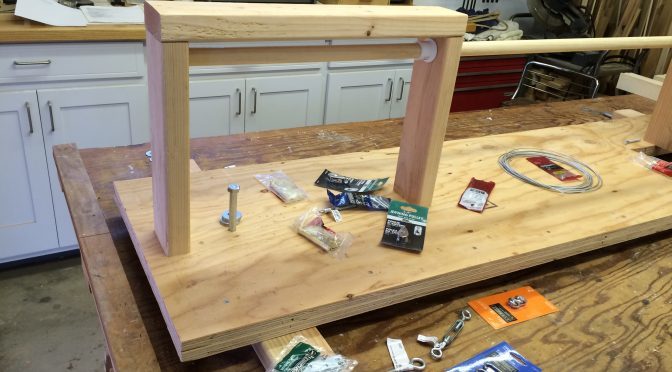
Construct the steering frame from 2″ x 4″s, a 1″ hole is drilled through the back support and halfway through the front support for the steering rod. The holes should be approximately 1 1/4″ down from the top of the supports. Build the steering housing first, then place it on ...
Brakes Housing
Cut two brake housing supports and one top per dimensions on sk-10. figure sk-10 The brakes consist of three components, the housing, the arm and linkage assembly, and the pedal. The housing is made up of two supports and a top piece, as shown in figure sk-10. Note that front ...
Brake Linkage
Cut three pieces of 2″ x 4″ 8′, 9″ and 14 1/2″ long. The 8″ and 9″ pieces will form the brake linkage and the 14 1/2″ piece is the brake arm. The arm and linkage assembly goes together as shown in figure sk-13 and is then fastened to the ...
Brake Pedal
The brake pedal is made from a 8″ x 10″ piece of plywood with a piece of 2″ x 4″ fastened across its top. This pedal is fastened to the frame with two hinges. It has an eyebolt through its top part, to which the brake cable is fastened. The ...
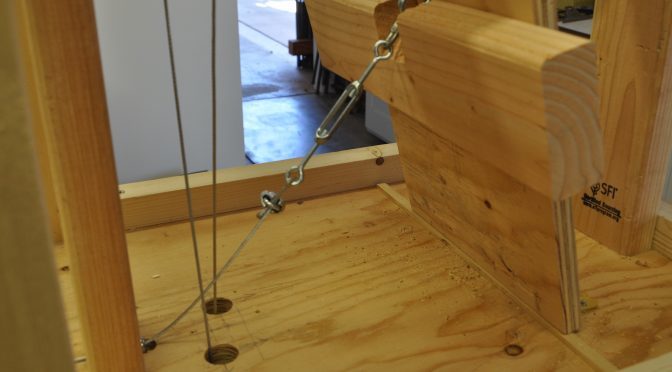
Brake System
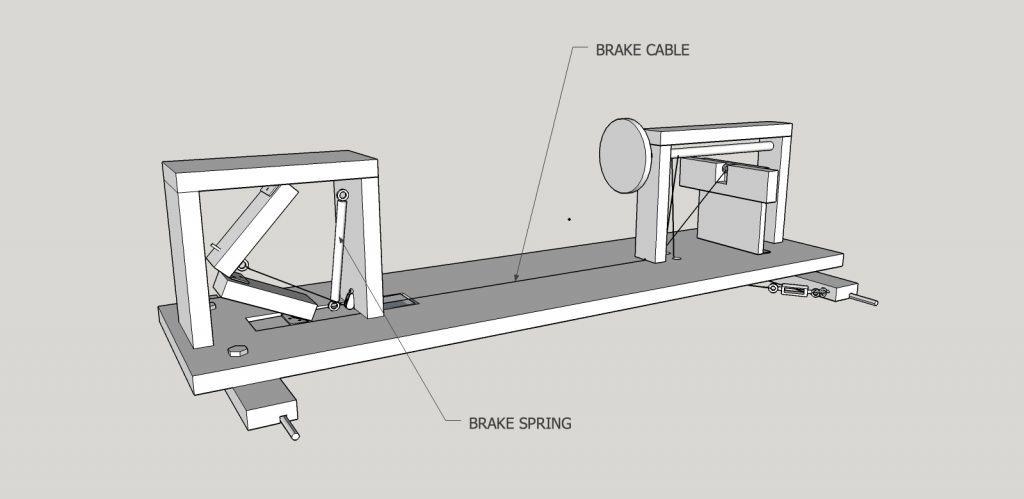
Once all the brake parts are assembled the brake cable and spring may be attached as shown in figure sk-26. figure sk-26 ...
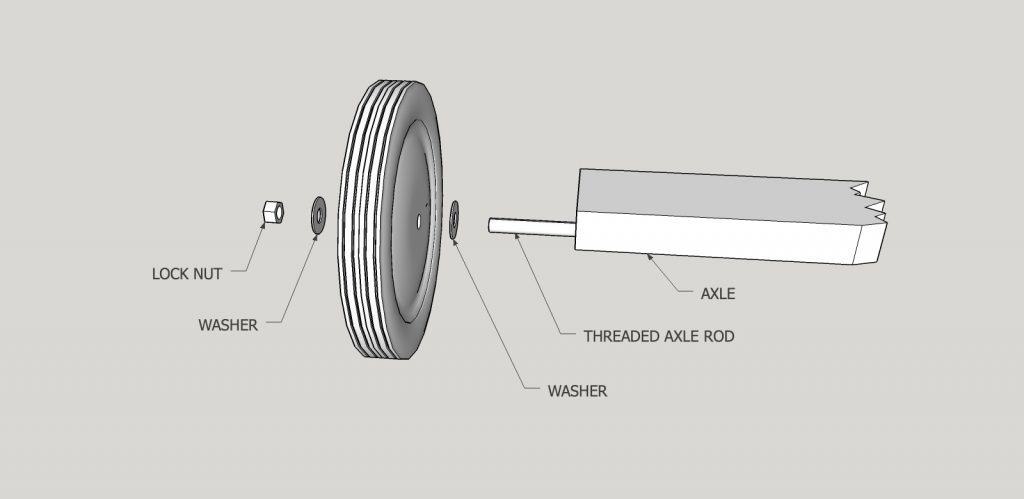
Axles Materials
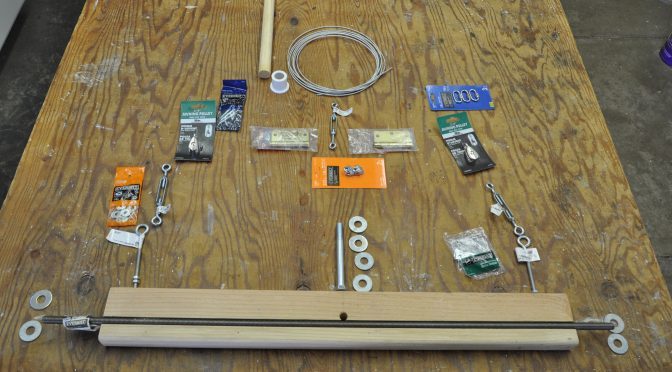
Shown above is the hardware needed for the front axle and steering system. The rear axle is similar to the front ...
Axles Step 1
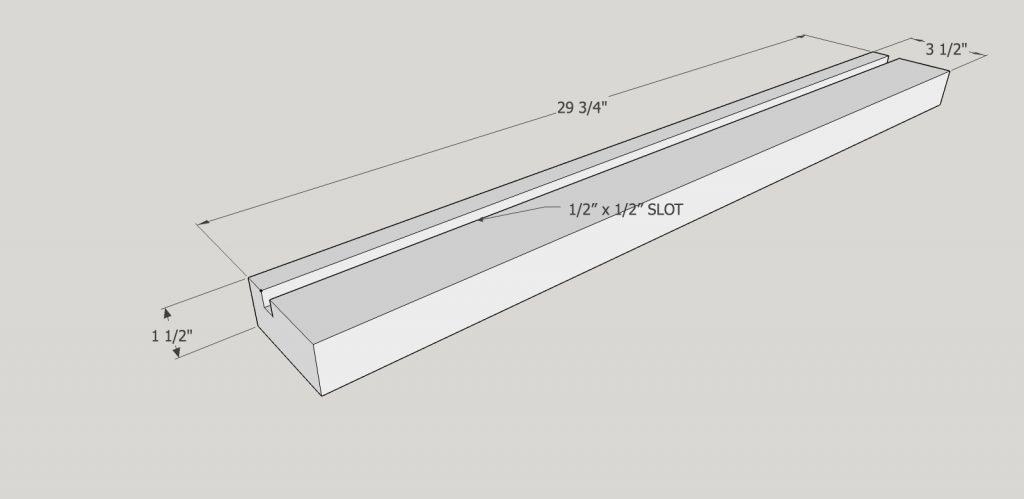
figure sk-19 Cut two 2″ x 4″ pieces 29 3/4″ long. Each piece has a 1/2″ x 1/2″ groove cut along its length, offset from the center per sk 19. This groove is for the 1/2″ diameter threaded axle rod. The groove should be a little on the tight side ...
Axle Step 2
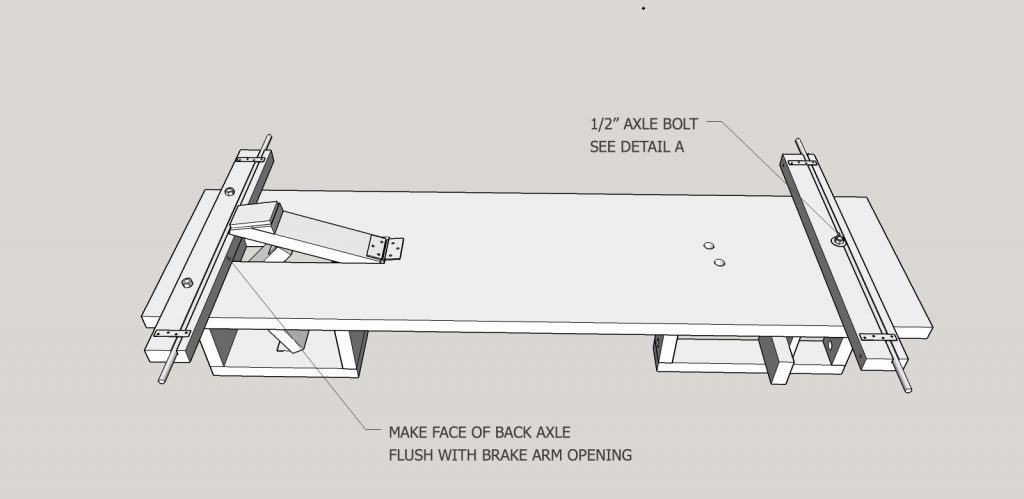
figure sk-21 The rear axle assembly is fastened to the underside of the frame with 1/2″ bolts. Drill a 1/2″ hole in the middle of the front axle, located as close to the threaded axle rod as possible. Center the axle so that this hole is 6″ from the front ...
Steering Wheel
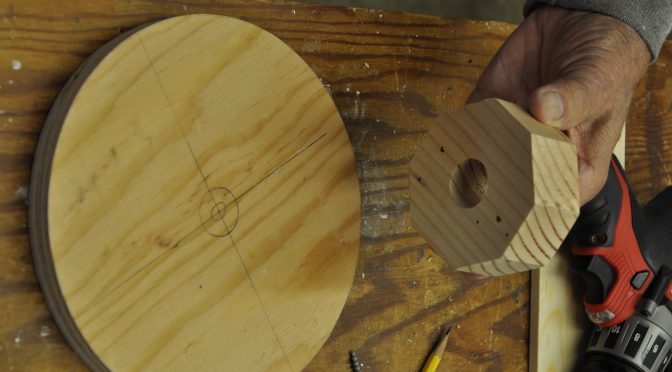
The steering wheel can be a piece of wood (plywood recommended) cut into a circle about 8″ in diameter. A block of 2″ x 4″ with a 1″ hole is then fastened to the wheel which is then fastened to the steering rod. Use a 3″ wood screw through the ...
Steering Cable
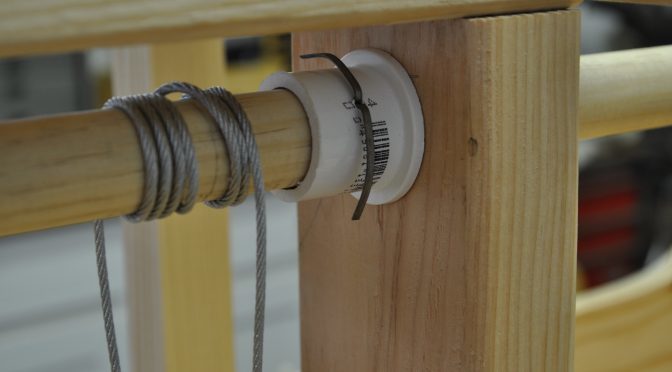
Cut the small end off the 1″ x 3/4″ pvc reducer brushing, pass the 1″ steering rod through the rear support and slide the pvc reducer brushing onto the steering rod with the flange toward the support. Continue passing the steering rod until it enters the hole in the forward ...
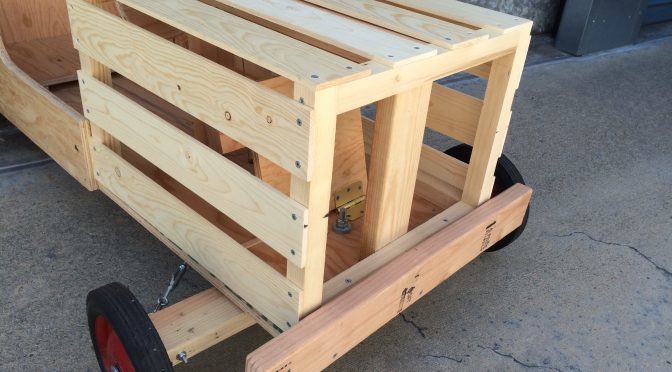
Crate Construction
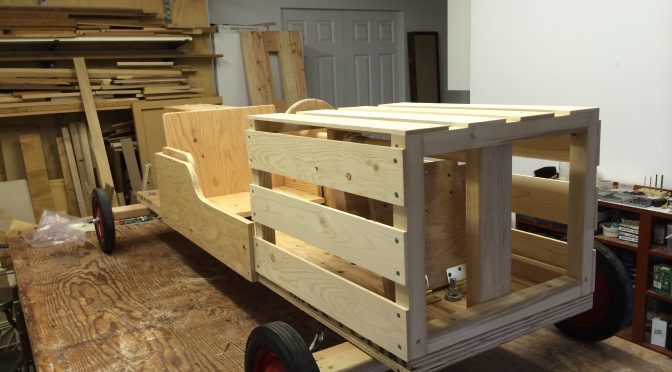
The crate is the signature piece of the car. It MUST look like an old time orange crate. The frame of the crate is made of 2″ x 2″ wood (1 1/2″ x 1 1/2″). The front and back pieces are rectangular in shape. The front piece has four sides ...
Seat and Side Panels
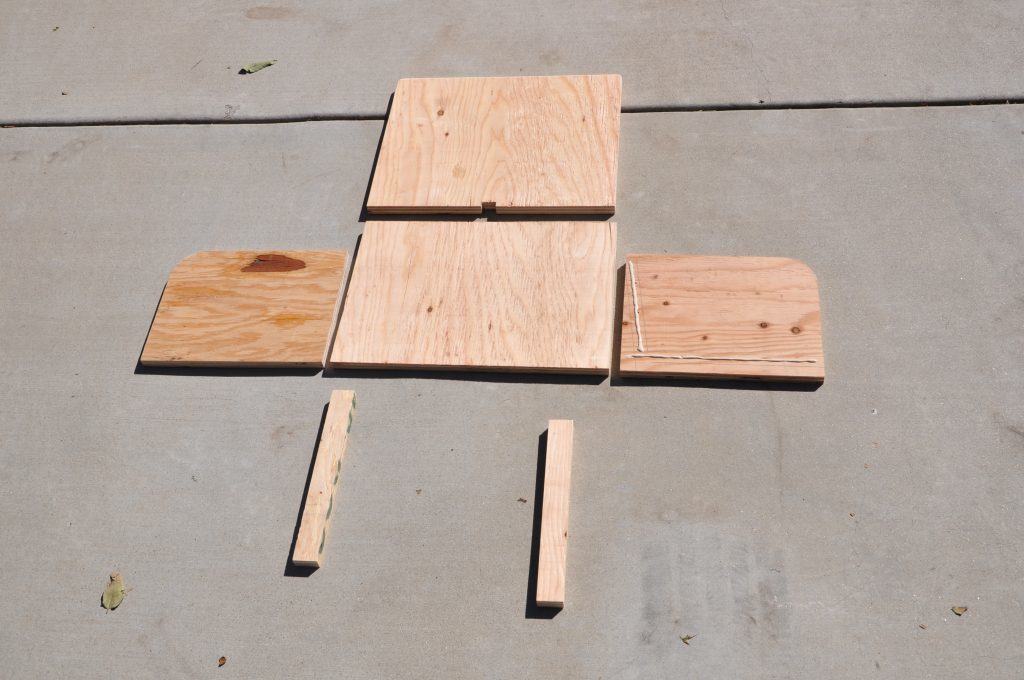
figure sk-32 figure sk-33 Cut the sides, sk-33, and seat parts, sk-34 according to the dimensions in the sketches. figure sk-34 The seat is made from plywood as shown in figure sk-34. The two runners under the seat are to provide clearance for the brake cable. The seat will be held ...
Bumper Construction
All new cars must have a front bumper, made from a 28″ long 2″ x 4″. It is highly recommended that existing cars be fitted with a bumper ...